
Achieve Perfect Highlights with Sonia Jimenez Cambronero
- Dec 16, 2025
- 3 min read
Professional Technique for Controlled Highlights with Complete Toning
Step by step by Sonia Jiménez Cambronero

Achieving truly perfect highlights is an art that combines technique, knowledge, and sensitivity. Every section, every transparency, and every tone builds a colour full of light, movement, and harmony. The goal is not only to lighten the hair, but to transform it while respecting its structure and enhancing its natural beauty. In this process, every step matters and every detail makes the difference.
“For me, perfect highlights are not about speed, but about precision. The key is to listen to the hair, work calmly, and trust the process. When technique aligns with intention, the result is always extraordinary.”— Sonia Jiménez Cambronero
This procedure describes a technical highlight service using fine weaves (babylights and controlled sections), aimed at achieving an even lift, progressive luminosity, and a polished final finish through root toning and global toning. It is organised so professionals can clearly identify each phase, following the order of the process photos.

Photo 1 – Start of Application: Fine Highlights in the Lower Section
Objective
Create a soft, even lightened base starting at the nape area.
Essential procedure
Create a horizontal section at the lower nape.
Elevate the section to a 90° angle from the scalp.
Select fine highlights using a precision tail comb, leaving uniform see-through sections.
Place thermal foil and apply lightener to mid-lengths and ends.
Ensure proper saturation and seal the foil securely.


Photos 2–3 – General Foil Placement
Objective
Build a balanced pattern for harmonious and progressive lightening.
Distribution
Lower and mid sections: Full panels with thermal foils for controlled lift.
Sides: Diagonal-back sections to create a soft, natural contour.
Top section: Fine babylights to blend the roots without harsh lines.
Key point
Combine full sections with babylights, maintaining clean saturation and precise alignment to achieve an even lift.


Photos 4–5 – Lightening Control Phase
Objective
Monitor and balance the lightening process to prevent banding or uneven results.
Technical control
Gently open the foil to assess the underlying pigment (ideal level: pale yellow, level 9–10).
Lightly massage the product through mid-lengths and ends to reactivate processing and improve uniformity.
Check every 5–10 minutes, depending on hair type and developer strength.

Photo 6 – Post-Lightening and Treatment
Technical wash
Cleanse with an acidic pH shampoo to neutralise alkaline residues and help close the cuticle.
Reconstructive treatment
Apply a nourishing formula rich in amino acids, hydrolysed proteins, and hydrating agents. Work section by section, from mid-lengths to ends, and leave on for 5–10 minutes.

Photo 7 – Root Toner / Root Shadow
Objective
Create a smooth transition between the natural root and the lightened areas, adding depth and a professional finish.
Application
On damp hair, apply an acidic colour to the root area.
Blend into the mid-lengths using fingers or a comb to create a seamless gradient.
Processing time: 10–15 minutes, depending on desired pigment intensity.
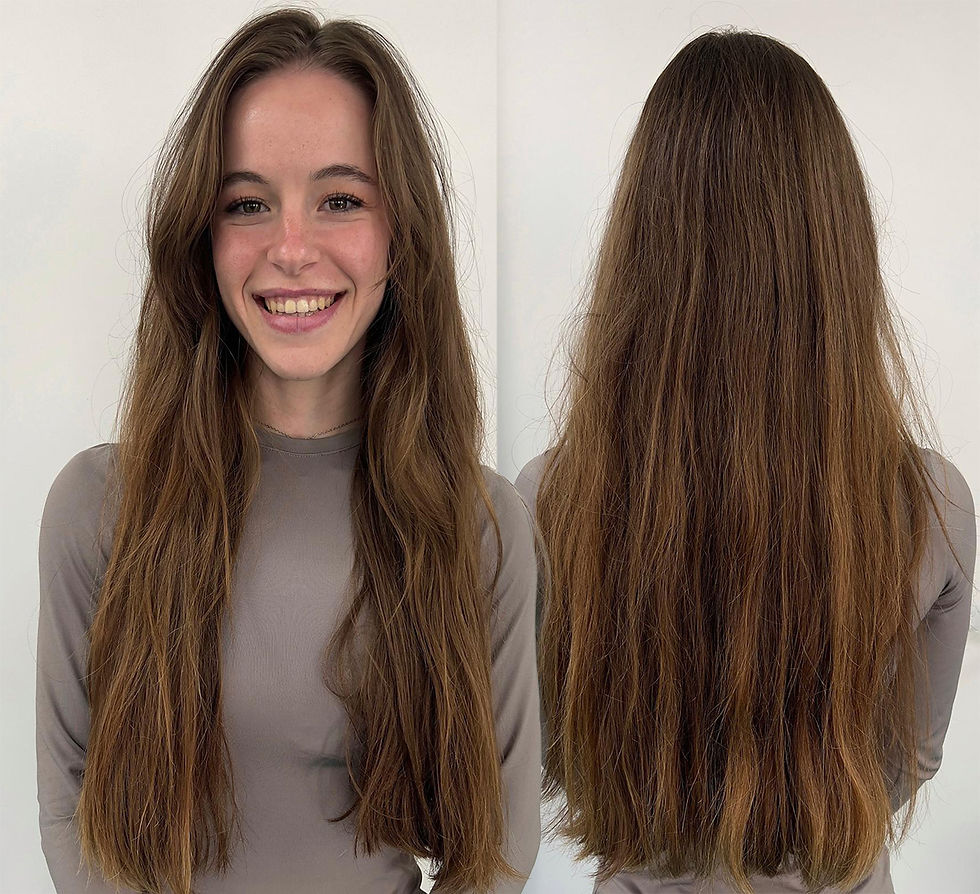
Result
A softened root with added depth and perfect integration with the rest of the colour.
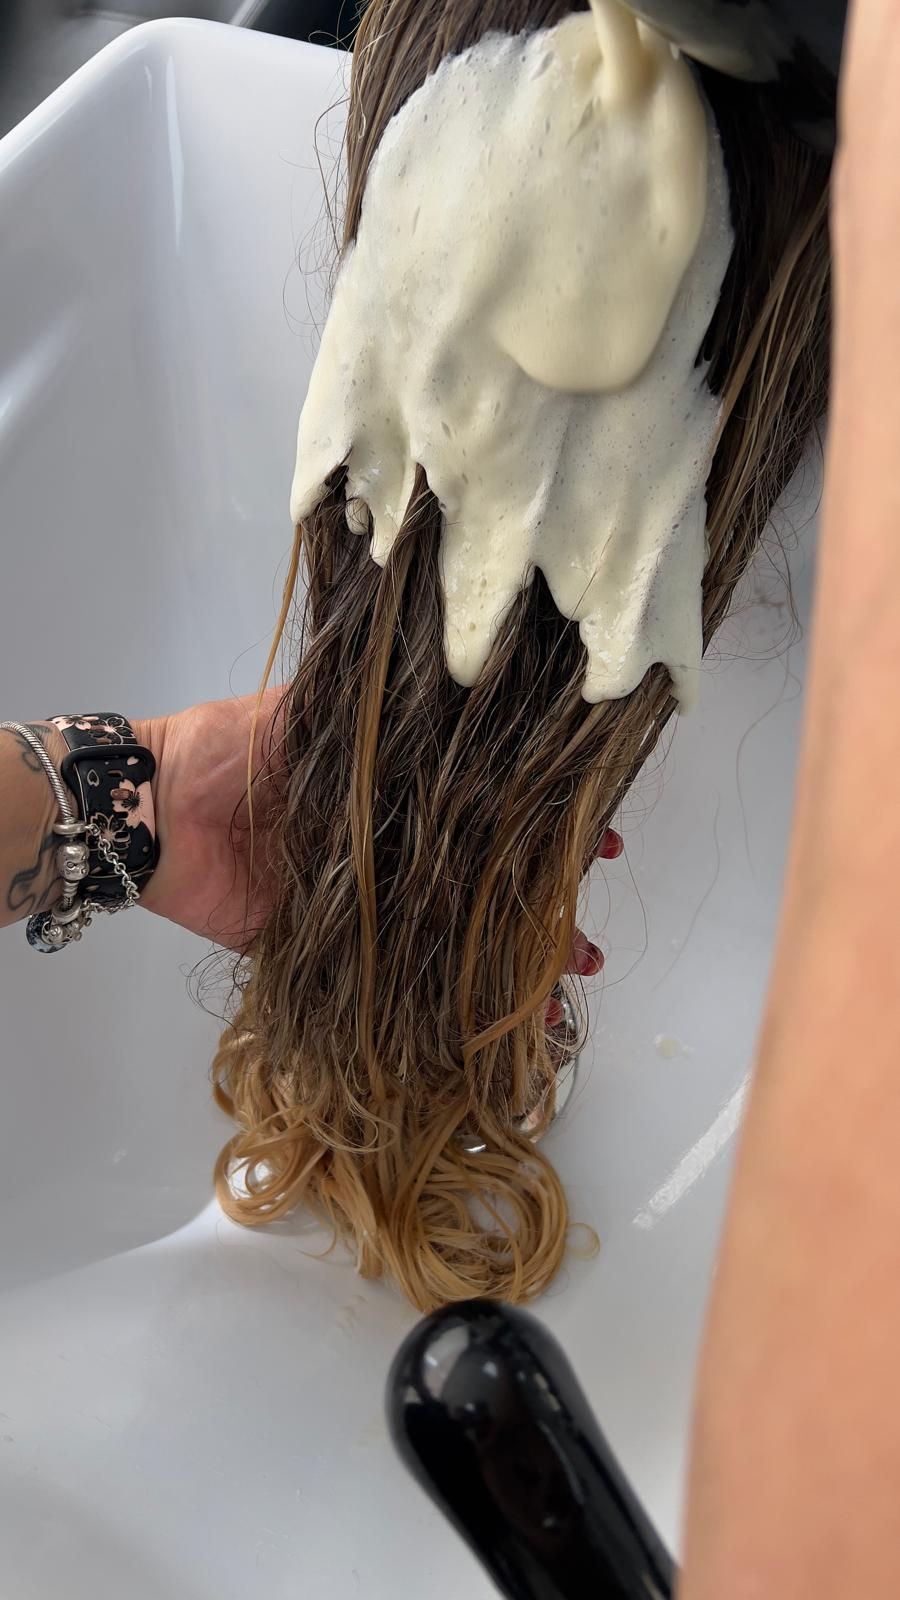
Photo 8 – Global Toning on Mid-Lengths and Ends
Objective
Neutralise remaining yellow or warm tones and unify the overall colour.
Procedure
Apply an acidic or demi-permanent colour (mixing ratio 1:2 with a gentle activator).
Distribute evenly from mid-lengths to ends, massaging for full saturation.
Process for 5–10 minutes, visually monitoring the tone.
Function
Neutralises unwanted undertones, enhances shine and colour harmony, and helps seal the cuticle after the lightening process.

Credits
Hair & Photography: Sonia Jiménez CambroneroInstagram: @soniacambronero
Comments